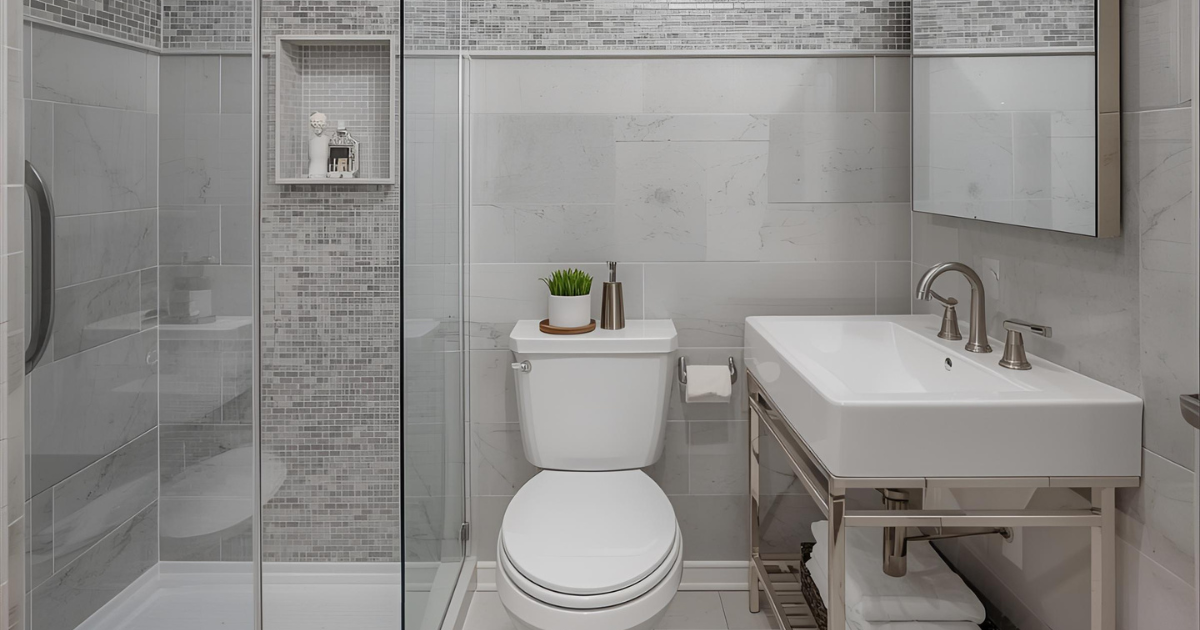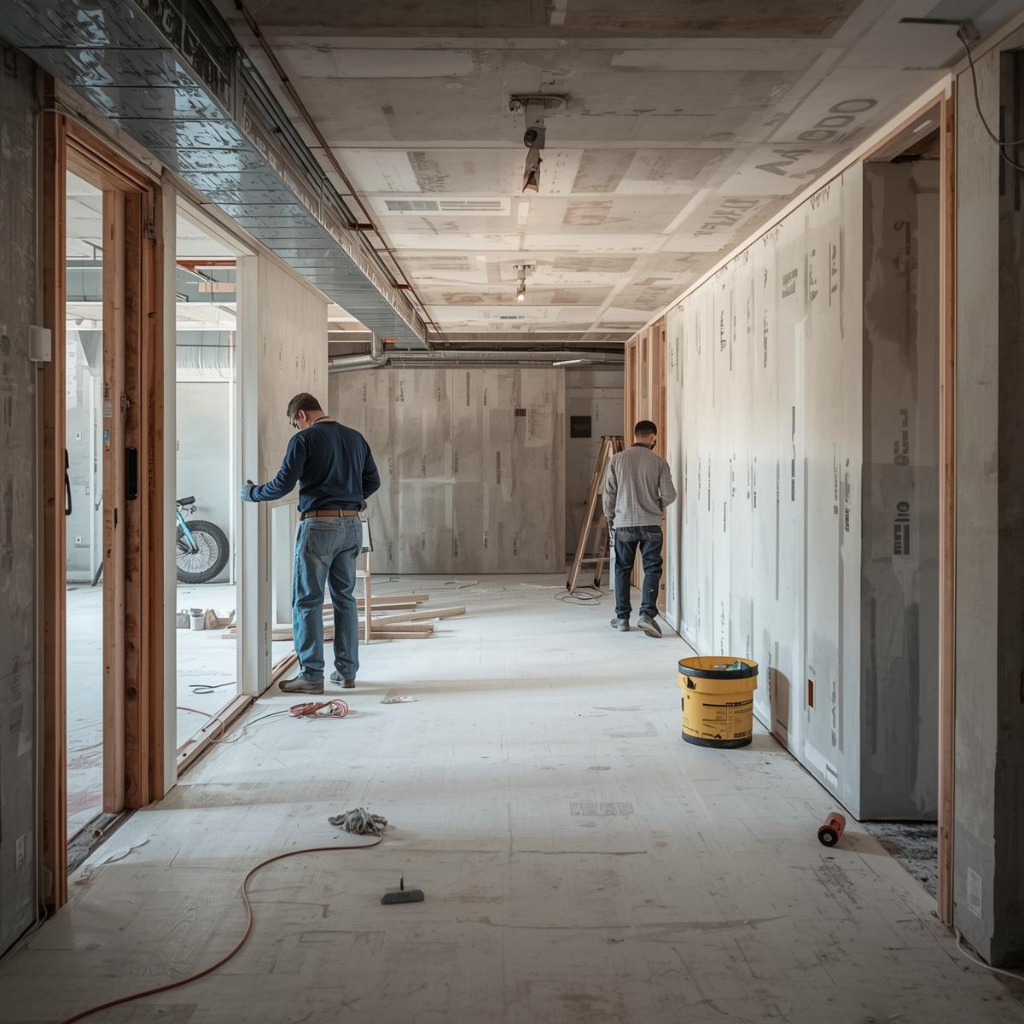

Finishing your basement is one of the smartest ways to add living space to your Central Iowa home. But rushing into the project without addressing hidden problems can turn your investment into an expensive mistake. This guide walks you through the three critical issues you must fix before any finishing work begins: radon, moisture, and code compliance. By the end, you will understand exactly what to check, what it costs to fix, and why the order matters.
TLDR: Iowa has the highest radon levels in the nation, with 71.6% of homes above the EPA action level. Before finishing your basement, test for radon first (mitigation costs about $1,800 to $2,500), fix any moisture problems ($2,000 to $12,000 depending on severity), and verify your space meets code for ceiling height (7 feet minimum) and egress windows (5.7 square feet opening). Skipping these steps can destroy your ROI and create serious resale problems.
You have been thinking about finishing your basement for a while now. Maybe you need a home office, an extra bedroom for guests, or just more space for the kids to play. The square footage is already there, sitting unused beneath your feet.
But here is what too many homeowners discover the hard way: that beautiful new basement with the fresh carpet, the recessed lighting, and the cozy family room can become a nightmare within a year or two. Mold growing behind the drywall. Radon levels that put your family at risk. An appraiser who refuses to count your new “bedroom” because it does not meet code.
In Iowa, these are not edge cases. They are everyday realities. Our state has unique challenges that make pre-finish preparation absolutely essential. This guide gives you a clear checklist: radon first, then moisture, then code. Follow this order, and you will protect both your family and your investment.
Why Iowa Basements Are Different
Central Iowa presents specific challenges that homeowners in other states simply do not face. Understanding these factors helps explain why preparation matters so much here.
The Radon Reality
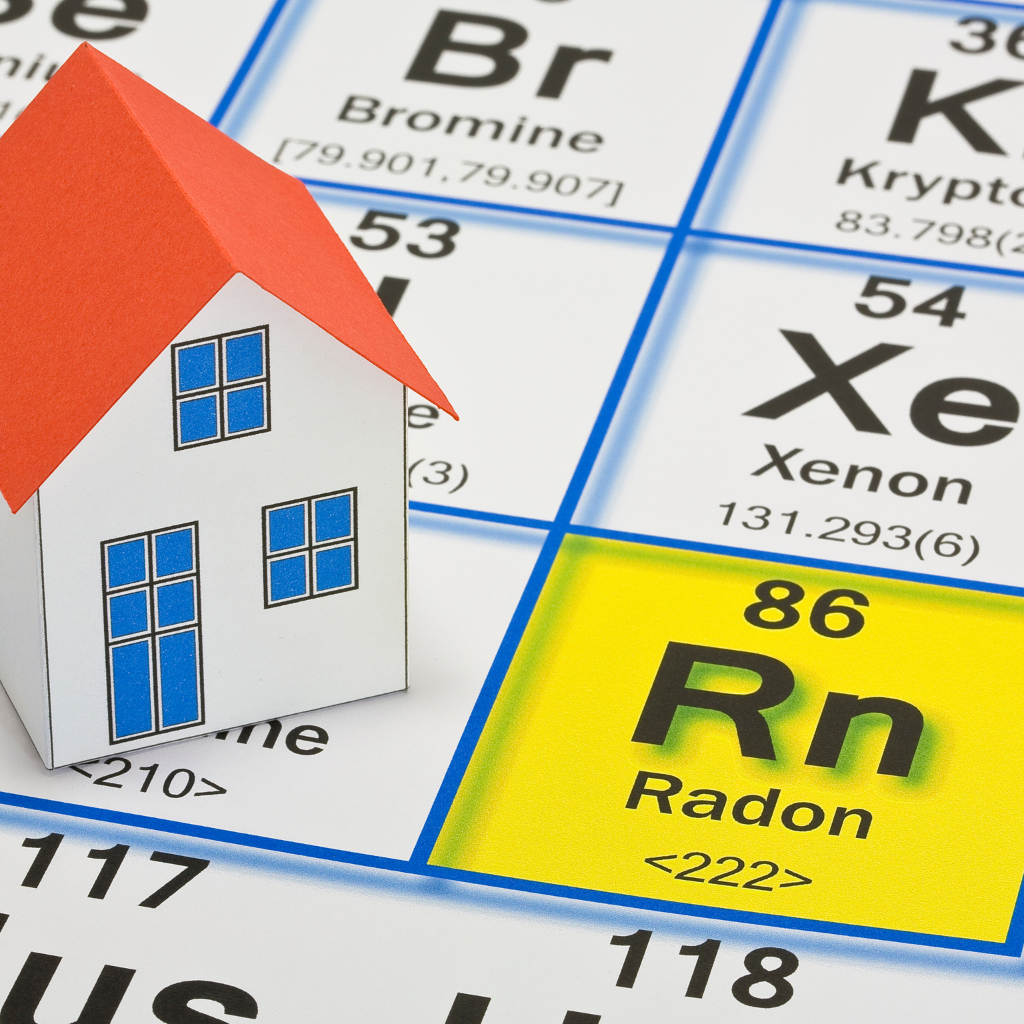
Iowa is not just a high-radon state. It is the highest-radon state in the country. The Iowa Department of Health and Human Services reports that 71.6% of Iowa homes test above the EPA action level of 4.0 pCi/L. The entire state is designated Zone 1 by the EPA, meaning every single county has the highest potential for elevated radon levels.
The average indoor radon level in Iowa is 8.5 pCi/L, compared to the national average of just 1.3 pCi/L. That means the typical Iowa home has radon levels more than six times higher than the national average.
Moisture and Clay Soil
Iowa’s clay-heavy soil creates hydrostatic pressure against foundation walls. When it rains, that soil expands and pushes water toward your basement. Add our freeze-thaw cycles, and you have conditions that test even well-built foundations year after year.
Building Code Specifics
Iowa uses the International Residential Code with local amendments. Basements must meet specific requirements for ceiling height, egress windows, and ventilation before they can be counted as livable space. Many older Iowa homes have basements that fall short of current standards.
Iowa’s Radon Problem: Why It Comes First
Radon is a radioactive gas that forms naturally when uranium in the soil breaks down. You cannot see it, smell it, or taste it. But breathe it long enough, and it becomes the leading cause of lung cancer among non-smokers, according to the EPA.
Basements are high-risk areas because radon seeps up from the soil beneath your foundation. It enters through cracks in the floor, gaps around pipes, and even through the concrete itself. In an unfinished basement with good ventilation, radon levels may stay manageable. But when you finish that space, you often seal it up, reduce air circulation, and create a room where radon can accumulate.
The Iowa Numbers You Need to Know
Understanding Iowa’s radon situation starts with the data. These are not scare tactics. They are facts from state and federal agencies.
The following table summarizes what Iowa homeowners face compared to the rest of the country.
| Metric | Iowa Value | U.S. Average | Why It Matters |
|---|---|---|---|
| Homes above 4.0 pCi/L | 71.6% | About 15% | Most Iowa homes need attention |
| Average indoor radon level | 8.5 pCi/L | 1.3 pCi/L | Over 6x the national average |
| EPA Zone designation | Zone 1 (all 99 counties) | Varies by region | Highest risk category statewide |
| Estimated annual lung cancer deaths from radon in Iowa | About 400 | 21,000 nationally | Significant local health impact |
These numbers explain why radon testing must be your first step before any basement finishing project. The CDC confirms that radon exposure is a serious public health concern, particularly in high-risk states like Iowa.
Testing Options and Costs
Radon testing is simple and affordable. The American Lung Association recommends that every home be tested, as radon is the second leading cause of lung cancer overall and the leading cause among non-smokers. You have several options depending on your timeline and budget.
Short-term test kits cost $10 to $30 and give results in 2 to 7 days. These work well for initial screening. Long-term test kits cost $20 to $50 and measure radon over 90 days or more. They provide a more accurate picture of average exposure. Professional testing costs $125 to $400 and includes a certified technician who places monitors and interprets results. The EPA’s Citizen’s Guide to Radon provides detailed testing instructions for homeowners.
Tip: For the most accurate reading, test during heating season when windows stay closed. Place the test kit in the lowest livable area of your home, at least 20 inches off the floor.
Mitigation: What It Costs and How It Works
If your test shows radon levels at or above 4.0 pCi/L, you need mitigation. The good news is that modern mitigation systems work extremely well and cost less than most people expect. According to the EPA’s Consumer Guide to Radon Reduction, some systems can reduce radon levels by up to 99%.
The most common approach is called sub-slab depressurization. A contractor drills a hole through your basement floor, inserts a pipe, and connects it to a fan that runs continuously. The fan creates negative pressure under your foundation, pulling radon from the soil and venting it safely above your roofline.
In Iowa, radon mitigation typically costs between $1,800 and $2,500 for a standard system. Factors that affect the price include home size, foundation type, and whether the system vents internally through the roof or externally through a wall.
Tip: Installing radon mitigation before you finish your basement is far easier and less expensive than adding it afterward. Once drywall, flooring, and ceilings go in, the contractor must work around finished surfaces, which increases both cost and disruption.
Illustrative scenario: A West Des Moines family tested their basement before starting a finishing project. Results came back at 12.4 pCi/L, more than three times the EPA action level. They paid $2,100 for a sub-slab depressurization system. Post-mitigation testing showed levels dropped to 0.8 pCi/L. Total time from initial test to completion: three weeks. Had they finished the basement first, the mitigation would have cost an additional $500 to $800 and required drilling through their new flooring.
Moisture and Water: How to Spot Problems Before You Cover Them Up
Water is the enemy of every finished basement. Even minor moisture problems can lead to mold growth, wood rot, and damaged finishes. The Department of Energy notes that controlling moisture is essential for both energy efficiency and preventing structural damage. Before you hang a single sheet of drywall, you need to know exactly what you are dealing with.
Signs of Moisture Problems
Walk through your basement and look for these warning signs. Some are obvious, others more subtle.
Efflorescence appears as white, powdery deposits on concrete walls. It forms when water moves through the concrete and leaves mineral salts behind. Efflorescence itself is not harmful, but it tells you that water is migrating through your foundation.
Musty smells indicate mold or mildew growth somewhere in the space. Even if you cannot see mold, that distinctive odor means moisture is present.
Water stains or tide marks on walls show where water has reached in the past. These lines indicate the high-water mark from previous flooding or seepage events.
Damp spots on floors or walls, especially after rain, reveal active water intrusion. Pay attention to where walls meet the floor, which is the most common entry point.
Peeling paint or bubbling finish on previously painted concrete indicates moisture pushing through from outside.
Common Causes in Iowa
Understanding why water enters your basement helps you choose the right fix.
Poor grading allows water to flow toward your foundation instead of away from it. The ground should slope away from your house at least 6 inches over the first 10 feet.
Clogged or missing gutters dump roof water directly against your foundation. A single downspout can discharge over 1,000 gallons during a heavy Iowa storm.
Hydrostatic pressure builds when saturated soil presses against your foundation walls. This is especially common with Iowa’s clay soils.
Foundation cracks provide direct paths for water to enter. Even hairline cracks can admit enough moisture to cause problems in a finished space.
Failed or missing drain tile allows water to collect around your foundation instead of draining away.
Moisture Solutions and Cost Ranges
Fixing moisture problems costs anywhere from a few hundred dollars to more than $10,000, depending on the source and severity.
The following table breaks down common moisture issues and their typical fixes.
| Symptom | Likely Cause | Typical Fix | Typical Cost Range |
|---|---|---|---|
| Minor seepage at floor-wall joint | Poor exterior drainage | Regrading, downspout extensions | $200 to $1,500 |
| Recurring water on floor after rain | Failed drain tile or sump | Interior drain tile and sump pump | $2,000 to $6,000 |
| Efflorescence on walls | Water migrating through concrete | Interior waterproofing membrane | $1,500 to $4,000 |
| Bowing or cracked walls | Hydrostatic pressure | Wall anchors or carbon fiber straps | $4,000 to $12,000 |
| Persistent musty smell | High humidity, hidden mold | Dehumidifier, mold remediation | $500 to $3,000 |
| Visible mold growth | Active water intrusion plus poor ventilation | Source repair plus professional remediation | $1,500 to $6,000 |
Start with the simplest fixes first. Sometimes regrading your yard and extending downspouts solves the problem completely. If those steps do not work, move to interior solutions.
Illustrative scenario: An Ankeny homeowner noticed water pooling near the sump pump after every heavy rain. An interior waterproofing contractor installed a new drain tile system around the perimeter, added a backup sump pump, and applied a waterproof membrane to the lower walls. Total cost: $8,500. Three years later, the basement has stayed completely dry through multiple major storms.
Why Moisture Fixes Must Come Before Finishing
Installing drywall, flooring, and carpet over a wet basement creates the perfect environment for mold growth. The Whole Building Design Guide, a federal resource for construction professionals, emphasizes that moisture management is critical for building durability and occupant health. The moisture feeds the mold while the finished materials hide it from view. By the time you notice the problem, you may have mold throughout your walls and flooring.
Tearing out mold-damaged finishes costs far more than fixing the moisture issue upfront. A $50,000 basement finish ruined by mold can easily require $15,000 to $25,000 in demolition, remediation, and replacement, plus the health costs to your family.
Tip: After completing any moisture repairs, monitor the space for at least one full season, including Iowa’s spring rains and summer humidity, before starting finish work. This confirms your fixes are working.
Code Requirements That Shape What You Can Do: Ceiling Height and Egress
Even if your basement is dry and radon-free, you still cannot finish it however you want. Building codes exist to keep occupants safe. Failing to meet code means your finished space may not count as livable area, your permits may be denied, and your investment may not add the value you expect.
Ceiling Height Requirements
Most Iowa jurisdictions follow the International Residential Code, which requires a minimum ceiling height of 7 feet in habitable basement spaces. This measurement is taken at the lowest point, including any beams, ducts, or pipes that hang down.
Non-habitable areas like hallways, bathrooms, and laundry rooms may have slightly lower minimums, typically 6 feet 8 inches. However, check with your local building department for specific requirements in your area.
The following table summarizes key ceiling height rules.
| Space Type | Minimum Ceiling Height | What It Means |
|---|---|---|
| Habitable rooms (bedrooms, family rooms, offices) | 7 feet | Measured to lowest obstruction |
| Bathrooms, hallways, laundry | 6 feet 8 inches (varies by jurisdiction) | Check local codes |
| Areas under beams or ducts | 6 feet 4 inches minimum | For less than 50% of floor area |
If your basement ceiling falls short, you have limited options. Sometimes you can raise the floor above, though this is expensive and disruptive. More often, you must design around the limitations, accepting that certain rooms cannot legally be called bedrooms or that some areas will serve as storage rather than living space.
Egress Window Requirements
Every basement bedroom must have an egress window, which provides a safe escape route in case of fire or other emergency. The International Residential Code Section R310 specifies exact requirements.
Required egress window dimensions include a minimum net clear opening of 5.7 square feet for windows above grade, or 5.0 square feet for windows at or below grade in some jurisdictions. The minimum opening height is 24 inches. The minimum opening width is 20 inches. The maximum sill height is 44 inches from the finished floor.
If your egress window sits below grade, you need a window well that meets additional requirements. The well must have a minimum area of 9 square feet with horizontal dimensions of at least 36 inches. If the well is deeper than 44 inches, it requires a permanently attached ladder or steps.
Tip: Many existing basement windows are too small to meet egress requirements. Installing a proper egress window requires cutting into your foundation, which adds significant cost, typically $2,500 to $5,000 per window including the well and drainage.
What Happens When You Ignore Code
Skipping permits or ignoring code requirements creates several serious problems.
First, your local building department can require you to tear out non-compliant work. A finished basement built without permits may trigger a stop-work order and mandatory corrections.
Second, appraisers will not count non-compliant space as livable area. A “bedroom” without proper egress is just a bonus room or storage space in the appraiser’s eyes. This directly impacts your home’s value.
Third, there are safety and liability concerns. If someone is injured because your basement lacks proper egress, you face potential legal exposure.
Illustrative scenario: A Des Moines family finished their basement and listed the room as a fourth bedroom when they sold the home. The buyer’s inspector noted that the window measured only 3.8 square feet, short of the 5.7 square foot requirement. The appraisal came back $18,000 lower than expected because the room could not be counted as a bedroom. The sellers had to either install a proper egress window at the last minute or accept the lower sale price.
How Ignoring Radon, Moisture, and Code Destroys ROI and Appraisals
Finishing a basement can add significant value to your home, but only if you do it right. Cutting corners on radon, moisture, or code compliance can cost you far more than you save.
The Appraisal Reality
Appraisers follow strict guidelines when evaluating basement space. Under Fannie Mae Selling Guide rules, any space partially or completely below grade must be reported as below-grade area. Below-grade space is not included in gross living area calculations. Instead, appraisers typically credit finished basement space at 50% to 75% of the value of above-grade space.
This means your $60,000 basement finish does not add $60,000 in value. Even perfectly finished basement space adds less value per square foot than space on your main floors. And if that space has problems, the discount gets steeper.
When Problems Surface Later
The worst time to discover radon, moisture, or code issues is during a sale. Buyers today often require radon testing, and their inspectors know what to look for.
If you finish a basement without fixing moisture issues, expect mold to appear within one to three years. By then, you face tearing out walls, flooring, and insulation to remediate the mold and fix the underlying water problem. A $50,000 basement finish can easily require $20,000 or more in repairs.
If you skip radon mitigation and a buyer tests high, you will either pay for mitigation anyway, often at a higher cost due to working around finishes, or you will lose the sale entirely.
If you ignore egress and ceiling height requirements, your finished rooms will not count as the bedrooms or living spaces you intended. The appraiser will note the deficiencies, and your home will be valued accordingly.
The Math on Doing It Right
Consider a typical Central Iowa basement remodeling project.
Budget basement finish with proper preparation might look like this: radon testing and mitigation costs $2,300, moisture repairs (interior drain tile and sump) cost $4,500, egress window installation costs $3,500, and the actual finishing work costs $45,000. Total investment: $55,300. According to NAHB construction cost research, interior finishes typically represent the largest share of construction costs, making quality workmanship essential.
At resale, that properly finished basement with bedroom, bathroom, and family room adds $35,000 to $45,000 in value. According to the 2025 Cost vs. Value Report from Zonda, basement remodels return approximately 71% of their investment, making them one of the more consistent interior improvement projects nationwide.
Now consider the same project done wrong. You skip radon testing, ignore minor seepage, and keep the undersized window. You spend $45,000 on finishes. Two years later, you find mold behind the drywall, spend $12,000 on remediation and repairs. At sale, the buyer tests high for radon, and you spend $2,800 on mitigation through finished surfaces. The appraiser does not count the bedroom because the window is too small, reducing your home’s value by $15,000.
Net result: You spent $59,800 total and added only $20,000 to $25,000 in value. Your actual return: 35% to 40%.
Real-World Style Scenarios
These examples illustrate how the order of operations, doing radon, moisture, and code work before finishing, determines outcomes.
Scenario 1: The Smart Sequence
A Johnston family planned to finish their 900-square-foot basement as a family room, bedroom, and bathroom. Before contacting contractors, they tested for radon. Results: 9.2 pCi/L.
They hired a mitigation company that installed a sub-slab system for $2,050. Post-mitigation levels: 1.1 pCi/L.
During their pre-finish inspection, they found minor efflorescence along one wall and a small crack near the floor. They regraded the exterior, extended downspouts, and sealed the crack for about $800 total.
They installed one egress window to make the bedroom code-compliant: $4,200 including the well.
Finally, they completed the finish work: $48,000 for framing, drywall, flooring, a full bathroom, and electrical.
Total investment: $55,050. The project passed all inspections. When they sold five years later, the appraisal credited the basement at $42,000, and the buyer’s radon test came back at 0.9 pCi/L. No negotiations, no surprises.
Scenario 2: Moisture Ignored
A Clive homeowner noticed occasional dampness along the basement floor-wall joint but decided it was not serious enough to address before finishing. They invested $52,000 in a beautiful basement renovation.
Eighteen months later, they noticed a musty smell in the basement. Investigation revealed mold growing behind the drywall along the exterior wall. The moisture problem had worsened over time, fed by poor drainage they never corrected.
Remediation required removing drywall, insulation, and carpet along two walls. Mold cleanup cost $4,500. Interior waterproofing to actually fix the problem cost $5,800. Replacing the damaged finishes cost $11,000.
Total additional cost: $21,300. The family spent $73,300 on a basement that would have cost $58,000 if they had done it right the first time.
Scenario 3: Egress and Height Overlooked
An Urbandale couple finished their basement and called it a four-bedroom home when listing for sale. The basement “bedroom” had a standard sliding window measuring 3.2 square feet (well under the 5.7 minimum) and ceiling height of 6 feet 10 inches under the ductwork.
The buyer’s appraiser measured carefully. The basement room did not qualify as a bedroom due to insufficient egress. The appraiser also noted the ceiling height issue. The finished basement was valued as bonus space only, not as a bedroom.
The appraisal came in $22,000 below the asking price. After negotiation, the sellers accepted $18,000 less than expected. They could have installed a proper egress window for about $4,000 and gained $18,000 in value.
Scenario 4: Radon After the Fact
A Waukee family finished their basement beautifully, then put the home on the market three years later. The buyer requested a radon test, a standard practice in Iowa real estate transactions.
Results: 8.7 pCi/L.
Installing mitigation through the finished basement required drilling through the new tile floor and routing pipe through a finished closet. The more complex installation cost $2,900, about $700 more than a pre-finish installation would have cost.
Worse, the buyers negotiated a $3,500 price reduction for the “inconvenience and uncertainty” of buying a home with known radon issues, even with mitigation in place.
Total cost of not testing first: $6,400, plus the stress of a nearly failed sale.
Step-by-Step Pre-Finish Checklist for Iowa Basements
Use this checklist to prepare your basement properly before any finish work begins.
Step 1: Radon Test
Order a test kit or schedule professional testing. Place the test in the lowest area of your home that you plan to occupy. If results show 4.0 pCi/L or higher, which is the EPA’s recommended action level, schedule mitigation before proceeding with any finish work.
Who to involve: DIY test kits work well for screening. For real estate transactions or detailed results, hire a certified radon measurement professional.
Step 2: Moisture and Structural Check
Conduct a thorough visual inspection of all foundation walls and floors. Look for cracks, efflorescence, water stains, and signs of past flooding. Note any musty odors. If you see warning signs, consult a waterproofing professional or structural engineer before proceeding.
Who to involve: You can do the initial inspection yourself. For any concerns, bring in a professional waterproofing contractor or structural engineer.
Step 3: Code and Layout Review
Measure ceiling heights at all points, including under beams and ducts. Identify any rooms that will be used as bedrooms and check existing windows against egress requirements. Contact your local building department if you have questions about specific requirements in your jurisdiction.
Who to involve: Measure yourself, but verify requirements with your local building official or a qualified contractor who knows local codes.
Step 4: Budget Adjustments
Add radon, moisture, and egress costs to your budget before selecting finishes. These expenses are not optional extras. They are essential foundation work that must happen before the finish phase.
Who to involve: Get quotes from mitigation contractors, waterproofing companies, and window installers so you know actual costs.
Step 5: Design and Finish Planning
Only after addressing radon, moisture, and code issues should you finalize your design and select materials. At this point, you know exactly what space you have to work with and can plan accordingly.
Who to involve: Work with your contractor or designer to create plans that work within your space’s constraints.
The following table summarizes the pre-finish checklist.
| Step | What to Do | Why It Matters | Who to Involve |
|---|---|---|---|
| 1. Radon test | Test lowest occupied area | Iowa has 71.6% of homes above action level | DIY kit or certified professional |
| 2. Moisture check | Inspect walls, floors, joints for water signs | Moisture under finishes causes mold | Self, then waterproofing pro if needed |
| 3. Structural review | Look for cracks, bowing, settlement | Foundation issues worsen over time | Structural engineer if concerns exist |
| 4. Code verification | Measure ceiling heights, check egress | Non-compliant space loses value | Building official or knowledgeable contractor |
| 5. Budget planning | Include all preparation costs | Surprises later cost more | Quotes from specialists |
| 6. Design finalization | Plan layout within constraints | Work with what you actually have | Home remodeling contractor |
Frequently Asked Questions
Q: Do I really have to test for radon before finishing my basement in Iowa?
A: Yes. Iowa has the highest radon levels in the nation, with 71.6% of homes above the EPA action level. Testing costs under $30 for a DIY kit and could save you thousands in future mitigation costs. More importantly, it protects your family from the leading cause of lung cancer among non-smokers. There is no good reason to skip this step.
Q: How much does radon mitigation usually cost in Iowa?
A: Most Iowa homeowners pay between $1,800 and $2,500 for a standard sub-slab depressurization system. Factors that affect cost include home size, foundation type, and system routing. Installing mitigation before finishing your basement typically costs $500 to $800 less than retrofitting after finishes are in place.
Q: What are the most common signs of a moisture problem in a basement?
A: Look for white powdery deposits on concrete (efflorescence), musty odors, visible water stains or tide marks, damp spots on walls or floors after rain, and peeling paint on previously painted surfaces. Any of these signs indicate water is moving through your foundation and should be addressed before finishing.
Q: If my basement only gets a little damp during heavy rain, do I still need waterproofing?
A: Yes. “A little damp” under finished walls becomes mold behind drywall. Once you cover that concrete with framing, insulation, and drywall, any moisture creates a hidden environment where mold thrives. Fix the water issue first, even if it seems minor. Prevention costs far less than remediation.
Q: What is the minimum ceiling height for a finished basement room in Iowa?
A: Most Iowa jurisdictions require 7 feet minimum ceiling height in habitable spaces, measured to the lowest obstruction including beams and ducts. Bathrooms, hallways, and laundry areas may have slightly lower minimums around 6 feet 8 inches. Always verify with your local building department before starting work.
Q: Does every basement bedroom need an egress window?
A: Yes. Building codes require every bedroom to have an emergency escape route. For basements, this typically means an egress window meeting specific size requirements: minimum 5.7 square feet net clear opening, at least 24 inches high, at least 20 inches wide, with the sill no more than 44 inches above the floor. Windows below grade also need compliant window wells.
Q: Can I still call it a bedroom if it does not meet egress rules?
A: Technically, no. A room without proper egress cannot legally be called or marketed as a bedroom. Appraisers will not count it as a bedroom, which affects your home’s value. More importantly, a room without proper egress is a safety hazard for anyone sleeping there.
Q: How much does it typically cost to add an egress window?
A: Installing an egress window in a basement typically costs $2,500 to $5,000, including cutting the foundation opening, installing the window, and adding a proper window well with drainage. Costs vary based on foundation type, window size, and site conditions.
Q: Will appraisers count my basement square footage toward my home’s value?
A: Partially. Under Fannie Mae guidelines, finished basement space is reported separately from above-grade space and is not included in gross living area. Appraisers typically value finished basement space at 50% to 75% of above-grade space. Non-compliant features like inadequate egress or ceiling height further reduce the credited value.
Q: How does Busy Builders help homeowners avoid expensive mistakes before finishing?
A: Busy Builders approaches every basement finishing project by evaluating radon risk, moisture conditions, and code compliance before recommending a finish plan. Our team understands Iowa’s unique challenges and ensures your basement is properly prepared before any finish work begins. We would rather identify and fix problems upfront than have you discover them after your investment is complete.
Key Takeaways
Radon First
- Iowa has the highest radon levels in the country at 71.6% of homes above action level
- Test before finishing, not after
- Mitigation costs $1,800 to $2,500 and is far easier before finishes go in
- Post-mitigation testing confirms the system works
Moisture Before Materials
- Any dampness or water signs require investigation
- Fix the source before covering with finishes
- Interior drain tile and sump systems cost $2,000 to $6,000
- Mold remediation after the fact can cost $10,000 or more
Code Compliance Protects Value
- 7-foot minimum ceiling height for habitable space
- 5.7 square foot minimum egress window for bedrooms
- Non-compliant rooms do not count as bedrooms on appraisals
- Permits protect you legally and at resale
Order Matters
- Radon first, moisture second, code review third
- Address problems before committing to finish design
- Budget for preparation costs alongside finish costs
Professional Help Is Worth It
- Certified radon professionals know Iowa conditions
- Registered contractors understand local code requirements
- Getting it right the first time saves money
Ready to Finish Your Basement the Right Way?
You now understand why radon, moisture, and code compliance must come before any finishing work in your Iowa basement. The sequence matters, and getting it right protects both your family’s health and your financial investment.
Busy Builders has helped over 1,000 Central Iowa homeowners navigate basement finishing projects since 2020. We understand Iowa’s unique challenges, from our extreme radon levels to our clay soils to our local code requirements. Our approach prioritizes safety and long-term value, not just attractive finishes.
Here is what we offer:
- Pre-finish assessment to identify radon, moisture, and code issues
- Coordination with certified radon and waterproofing professionals
- Expert guidance on egress and ceiling height requirements
- Quality finish work built to last and add value
- Transparent pricing with no surprises
Ready to move forward?
Call: 844-435-9800
Website: https://busybuildersiowa.com/
We serve Des Moines, West Des Moines, Ankeny, Waukee, and all Central Iowa communities. Schedule your free consultation today, and let us help you finish your basement the right way.
Busy Builders | Full-Service Construction and Remodeling | Serving Central Iowa Since 2020